

I think maybe I should explain more about the step-printing gadget I showed you last time.
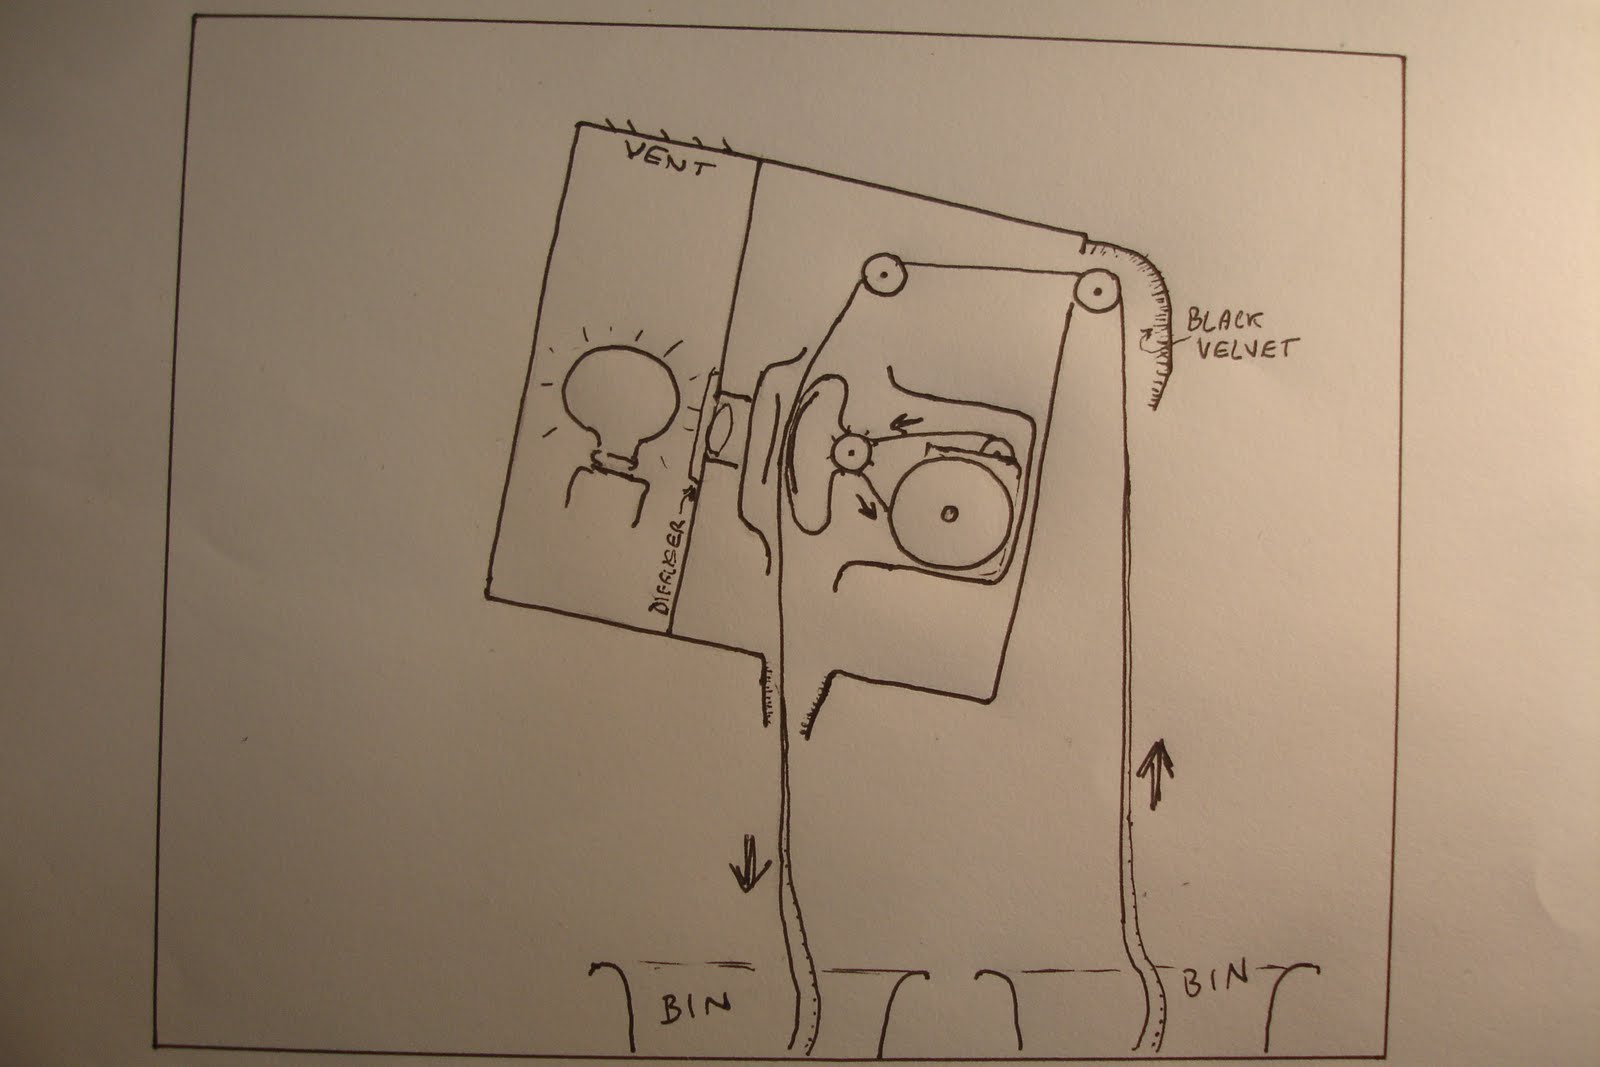
I now feel a little guilty sawing up that elderly Kodak, but at the time it was about cheapness. Maybe guilty's the wrong word, as this gadget has proved itself alot over the last few years. You can use virtually any 16mm spool-loading camera, as long as it can be persuaded to run two strips of film through the gate. With the Kodak, I first tried attaching a spool of film on the spindle I'd fixed above the gate. It worked, but I felt there was rather alot of drag, so I later arranged for the film to run up from a bin, into the box and down through the gate. It's touched at the edges only by concave rollers and black velvet. After leaving the gate it plunges into a second bin. By the way, if printing from single-perf film it has to run tail-end first, to enable the two emulsion layers to be in contact.
A step-printer is a good tool for making various effects. Because the camera film and the film to be printed share the same claw, the results should be rock-steady. In the other example right we can see how an unmodified camera, in this case a Bolex H16RX, can be used for bi-packing. Say you need moving foreground objects in your studio-shot, perhaps a train passing, or a bat flying by. First film a silouhette of the train or bat against some bright sky. Don't ask me where to find the bat ! Process the film. Now in the darkroom, interleave this matte shot with the start of a new unexposed roll. If it's a 100ft roll there will only be room for a few feet more, and some of that has to be leader. Most foreground subjects don't need to be contacted emulsion-to-emulsion because slightly soft edges enhance the effect. So the matte shot is printed normally head-first. In subdued light (or not, as I'll explain next time) manually load the camera with the two thicknesses of film around the sprockets. Important: Allow one frame of extra loop above and below the gate for the added effects element. (In the photo I've just loaded some clear leader to show you.) Interleave the films on the take-up. Run the camera for a second or so to check that all is well.
Now shoot the actors, and your moving foreground will appear magically on the film. Don't forget to remove the short strip of film in the dark prior to processing ! Not all subjects can be treated this way, but many can. Semi-silouhettes can also sometimes work.
Two points:
Because of the extra thickness of film, there is a discrepancy of focus that won't be seen in the reflex viewfinder. In practice I've found it doesn't amount to much, but I think to be on the safe side it's best to increase the depth of focus by using a smaller aperture.
The "clear" film around the matte foreground element will absorb some light, perhaps half a stop.
